Windows
Beforehand: To take advantage of the below mentioned services, an account of the Department is necessary.
Please ensure, that you have installed the latest driver for your networkcard, especially before making requests.
By using the VPN access of the department of computer science you accept the terms of agreement for the use of the VPN access.
Please make sure that your system is necessary secured, before connecting to the VPN. Please read our section about Software & Security for more information.
First install the latest version of the OpenVPN Client (Tested with Version 2.3.7)
1. Create your personal OpenVPN configuration
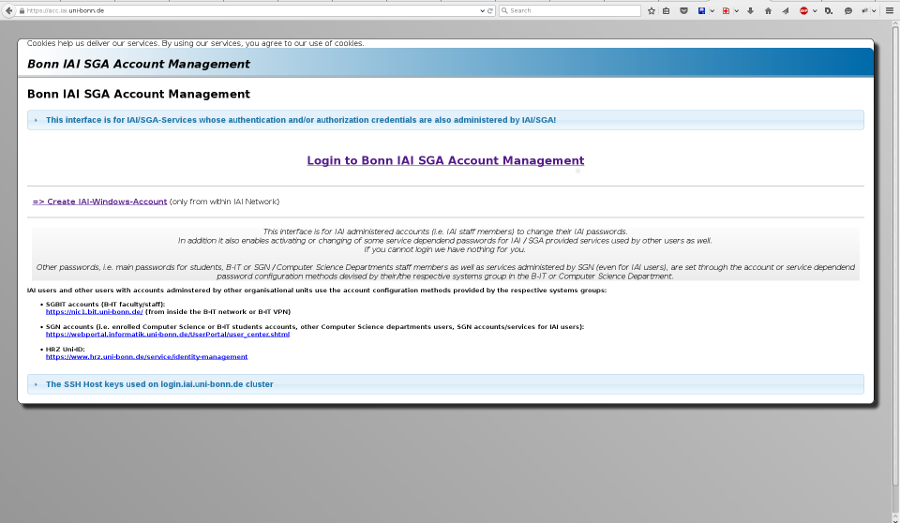
By connecting with the VPN it is necessary to create an individual OpenVPN configuration file. Go to https://acc.iai.uni-bonn.de and click on "Login to Bonn IAI SGA Account Management"
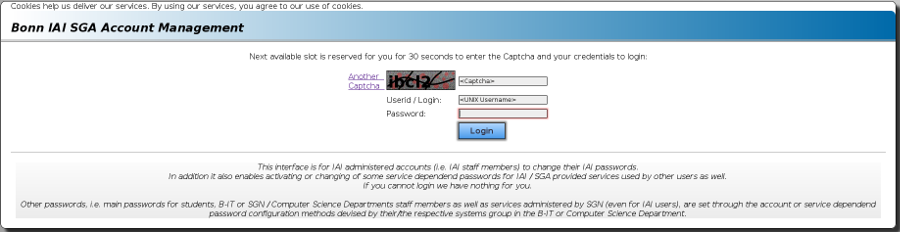
Type in your UNIX credentials and click on "Login"
(It is necessary that your browser allows Cookies otherwise the Login will fail. Please mind to type your credentials in less then 60 seconds otherwise the Input won't be valid)
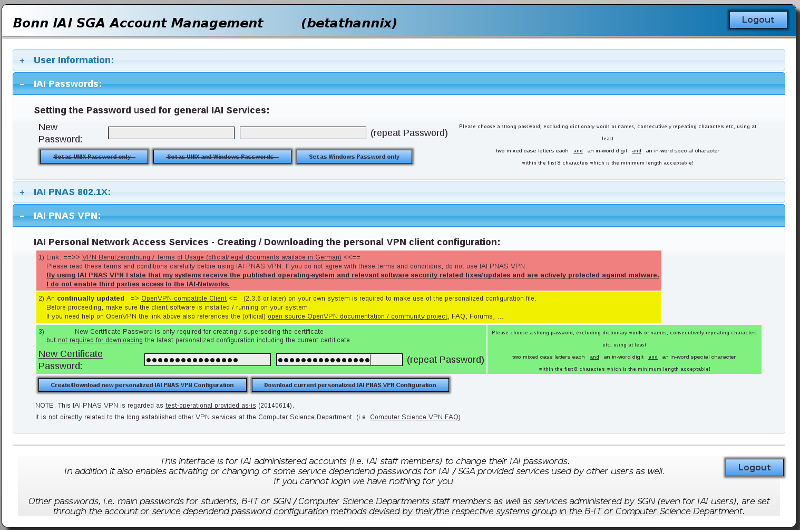
Now you can open the "IAI PNAS VPN:" tab, where you can type in the password for your OpenVPN configuration and download the .zip package afterwards.
2. Apply configuration to the OpenVPN Client
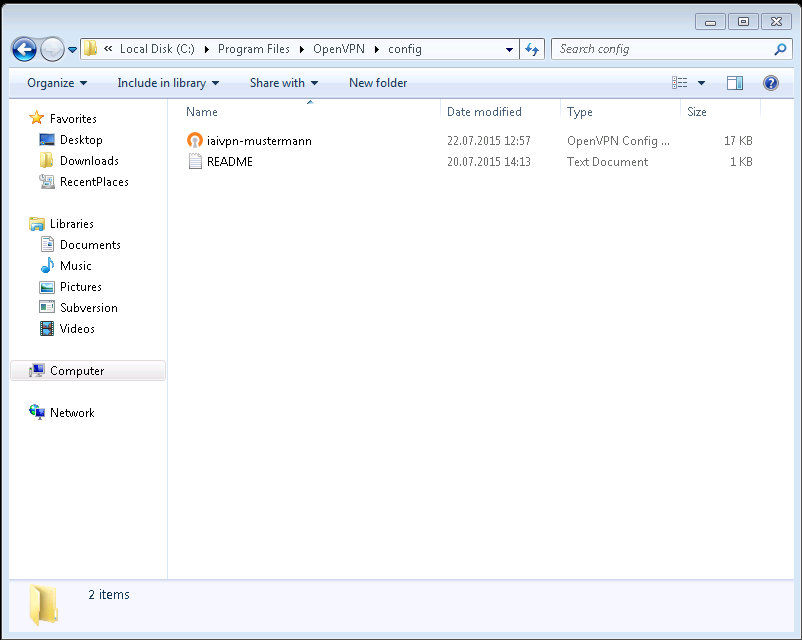
Extract the downloaded .zip package and open the installation directory of your OpenVPN Client. Now copy your OpenVPN configuration file "iaivpn-<username>.ovpn" to the "config" directory of the OpenVPN installation directory.
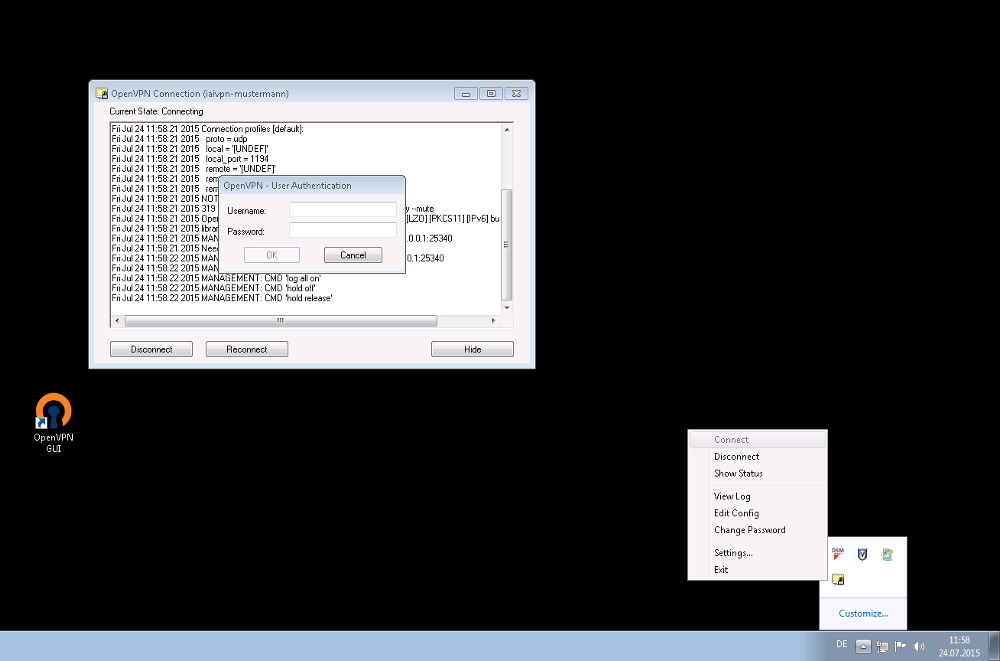
3. Establish a connection
Now start the "OpenVPN GUI" Application as Administrator. In the windows taskline should appear an Icon for the OpenVPN options. "Rightclick the Icon -> Connect" and then type in your user credentials. (Mind: first: UNIX Username + password second: Your OpenVPN configuration password) If the Icon lights green, you should have established a succesful connection to the IAI-VPN.
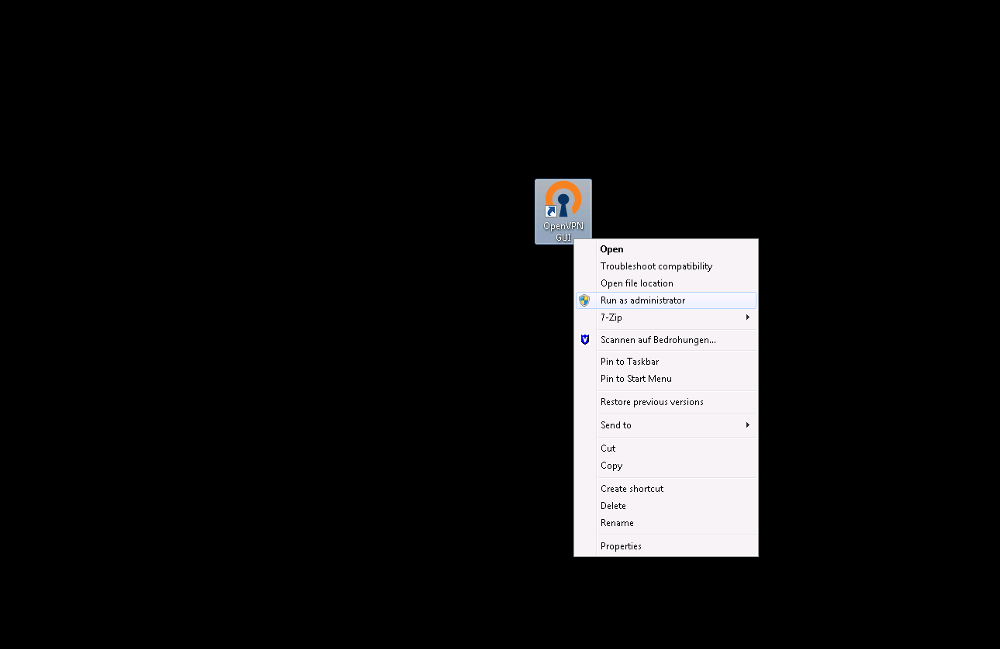

4. Run OpenVPN GUI always as Administrator
Because the OpenVPN GUI always needs to be executed especially as Administrator, we recommend to change the basic settings of the Application.
1. Execute the OpenVPN GUI
2. Open the Windows Task Manager
3. Open the tab "Processes"
4. Search for the "openvpn-gui.exe" and open the "Properties"
5. Open the tab "Compatibility" and check the "Run this program as an administrator" Checkbox, at the end confirm.