
Encryption with Veracrypt (Windows)
Veracrypt is the successor of the encryption software Truecrypt and was forked on Truecrypt after discontinuation of the development work and has been continuously further developed since then. Veracrypt can fully encrypt file containers or entire partitions and hard disks and decrypt them "on the fly" again. The following is an example of how Veracrypt can be used to encrypt the system partition on a Windows operating system.
General Information
With Windows updates there is the danger that the encryption can be endangered by the update, therefore it is strongly recommended to decrypt the system before the update, to carry out the update and to encrypt it afterwards again.
1. Download and Install Veracrypt
Veracrypt is freely available and can be downloaded from https://www.veracrypt.fr/en/Downloads.html for Windows, Mac OS or Linux. After downloading Veracrypt, Veracrypt should be installed by default.

2. Create volume
After Veracrypt is started, a container is first created by clicking on Create volume.

Create volume (2)
Next, the Encrypt System Partition or System Disk tab must be set and confirmed with continue.
Create volume (3)
It is sufficient if the system is fully encrypted and no more data can be reproduced when the device is stolen, for this reason it is continued normally with the tab, but it is left to the user to decide how much he wants to protect his system from third parties.

Create volume (4)
Next, select the tab to encrypt the entire drive, then install the Veracrypt bootloader, which requests the password before booting.
Create volume (5)
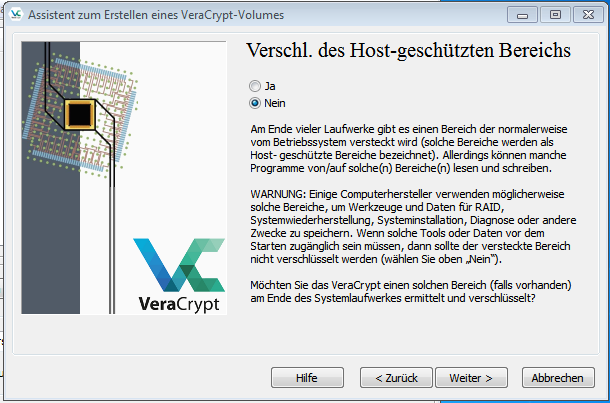
Next you have the choice if you want to encrypt the host area with, this may cause problems with raid systems or rescue partitions.
Create Volume (6)
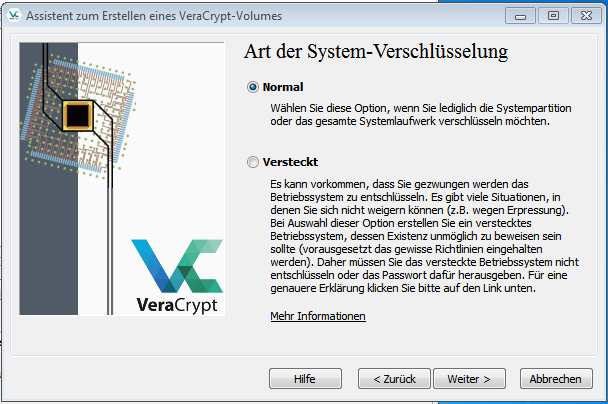
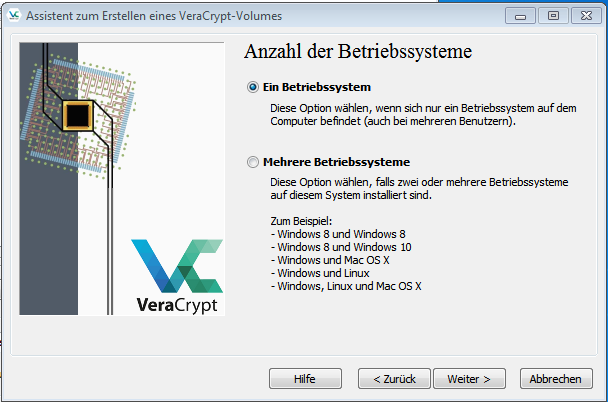
This manual only takes one operating system into account, which is why we continue with the corresponding tabs.

3. Configure encryption
Next, the type of encryption must be selected, usually the default settings are sufficient for reliable encryption.
Verschlüsselung konfigurieren (2)
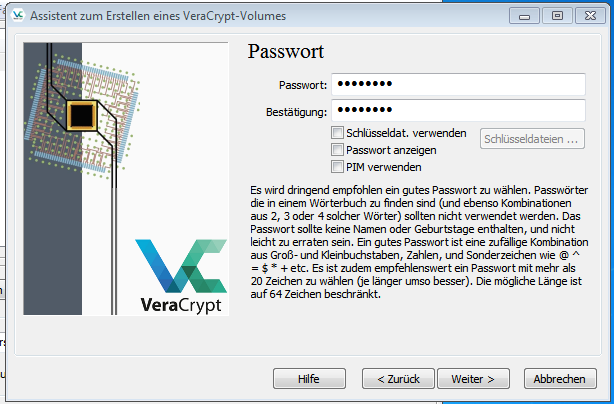
Next, a password must be set. We do not additionally set the Pim.

Verschlüsselung konfigurieren (3)
Als nächstes müssen zufällige Daten für die Generierung des Schlüssels gesammelt werden.
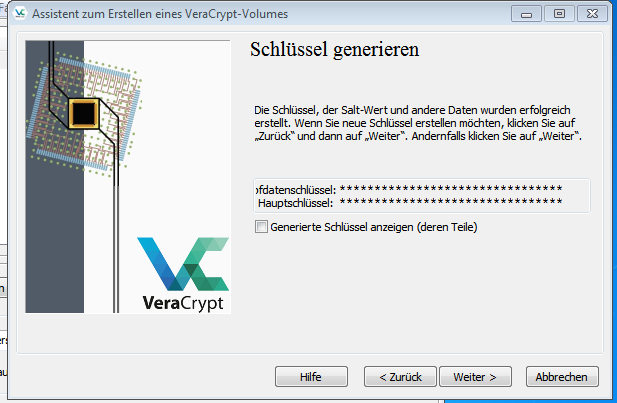
Verschlüsselung konfigurieren (4)


Verschlüsselung konfigurieren (5)
Als nächstes muss bei einem Schlüsselverlust oder sonstigen Schwierigkeiten ein Rettungsdatenträger erstellt werden. Dazu muss ein CD Roling eingelegt werden und anschließend das Brennprogramm automatisch gestartet werden.
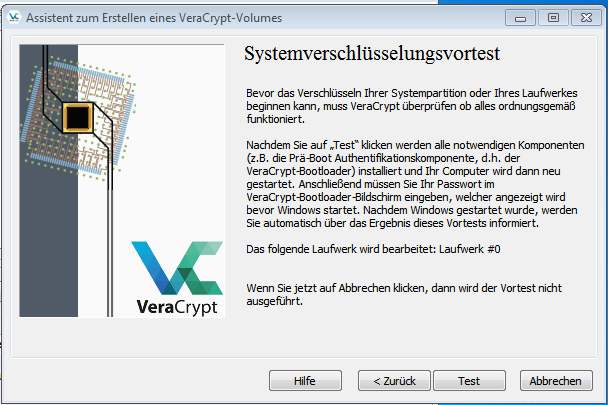
Verschlüsselung konfigurieren (6)
Im nächsten Schritt wird ein Verschlüsselungsvortest durchgeführt, dazu wird der Rechner neugestartet und der Veracrypt bootloader mit einer Passwortanfrage gestartet.


Nachdem der Vortest erfolgreich abgeschlossen wurde, kann Veracrypt anfangen das System zu verschlüsseln, dieser Vorgang kann zwischen 8-20 Stunden dauern, je nach Größe der Festplatte. Nach Verschlüsseln der Festplatte, ist das Setup abgeschlossen und das System kann wieder produktiv genutzt werden.